In this project we will be focusing on two important components of photography—depth of field and aperture.
Recall that when you take photos of a scene from various angles, those objects further away remain static
while those close by vary hugely in position. We will be using data collected by an array of cameras, along
with this simple principle, to simulate images of various depths and apertures.
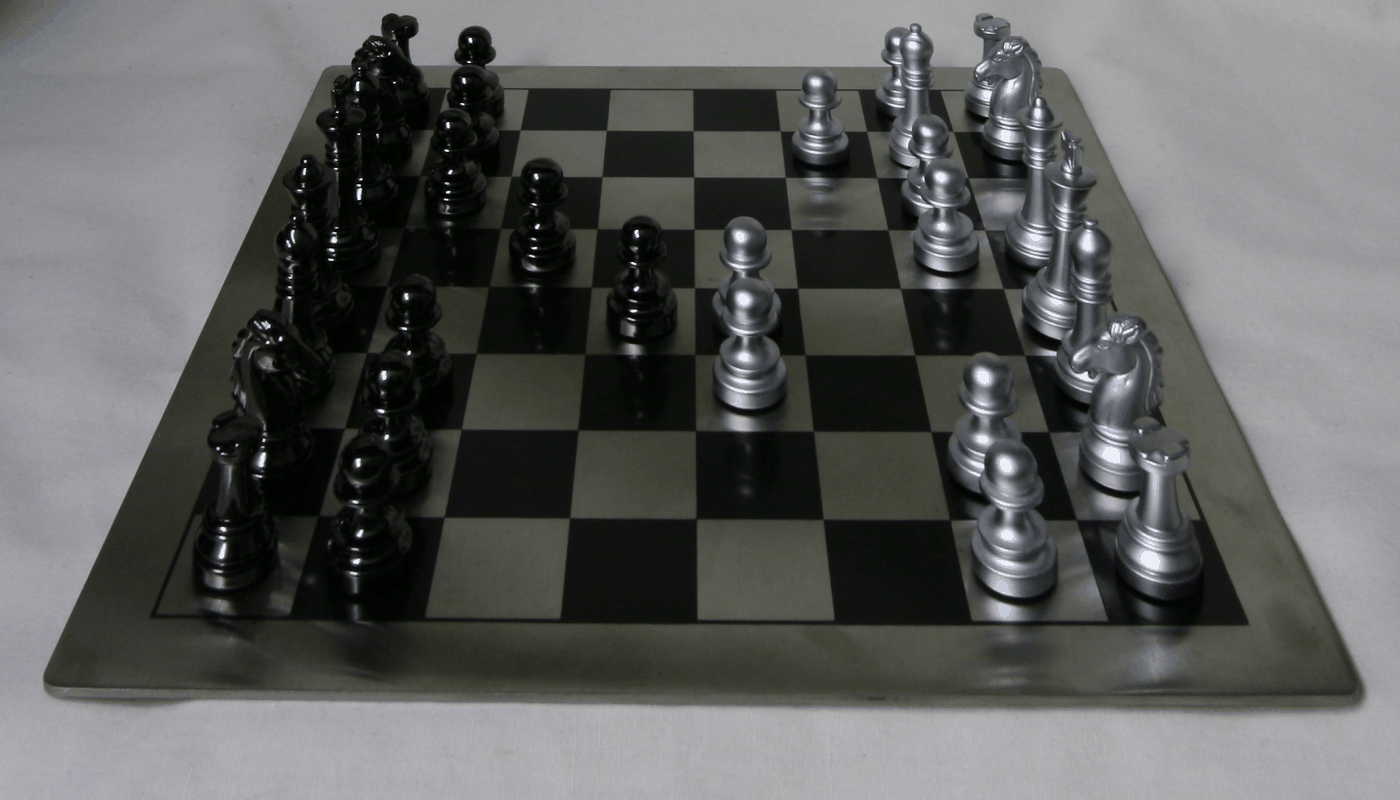
Part 1: Depth Refocusing
The data used in the follwing sections was taken from a camera array and belongs to the Stanford Light Field Archive. Using the fact stated
above about object-location constancy w.r.t distance from the lens, we can derive that shifting the images
from various cameras to form a composite can allow us to generate images of various perceived depths.
We do this by shifting the images by varying offsets to different degrees. Consider the captured chessboard
images. Since a \(17 \text{ by } 17\) array was used, we have a total \(289\) images, each with their
corresponding locations in the array. These locations are denoted by the tuples \((x, y)\). Notice that the
center of the array is located at \((8,8)\) and thus we shift each image by \(C \cdot (x - 8, 8 - y)\),
where C is a hyperparameter. By varying the value of C, we allow the image to align and focus on various
different parts of the image, also known as depth refocusing. The below animations are the result of
applying varying values of C to the corresponding image arrays.
C in \([-3, 1]\) with step size 0.2C in \([-3, 1]\) with step size 0.2
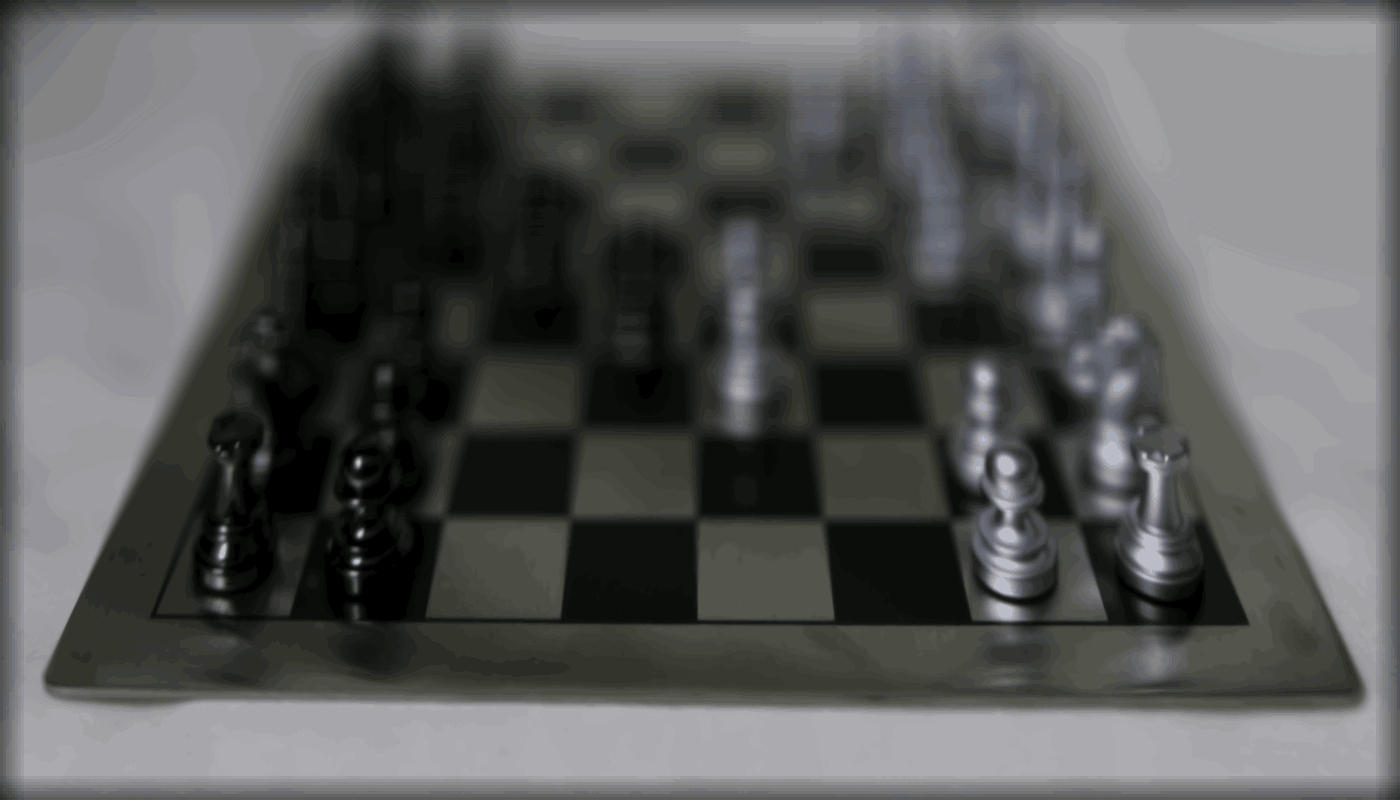
Part 2: Aperture Adjustment
Recall from class that aperture is defined as the space through which light passes in a camera. As such, if
this space is larger, the image will appear blurrier, and if the hole is smaller, the image will be clearer.
This behaviour was observed in the pinhole camera.
We achieved this affect by using the known locations of the image within the array. Considering the center of
the array to be \((8,8)\), we can calculate the euclidian distance from any camera center to the center of
the array. As such to simular an aperture of some value \(x\), we only consider images from camera centers
less than \(x\) units from the center. Averaging this subset of images gives us the desired result. Notice
that the larger the aperture, the blurrier the image, as expected. The below animations show the respective
images rendered at various apertures.
Apertures in \([1, 10]\) with step size 1Apertures in \([1, 10]\) with step size 1
Takeaways & Next Project
Overall I learned a ton about how image arrays can be used to synthesize various effects including depth and
aperture. This project allowed for a hands on approach to learning how these knobs affect the inner workings
of a camera and the produced image. Further more, the second project our group did, NeRF, is linked here.